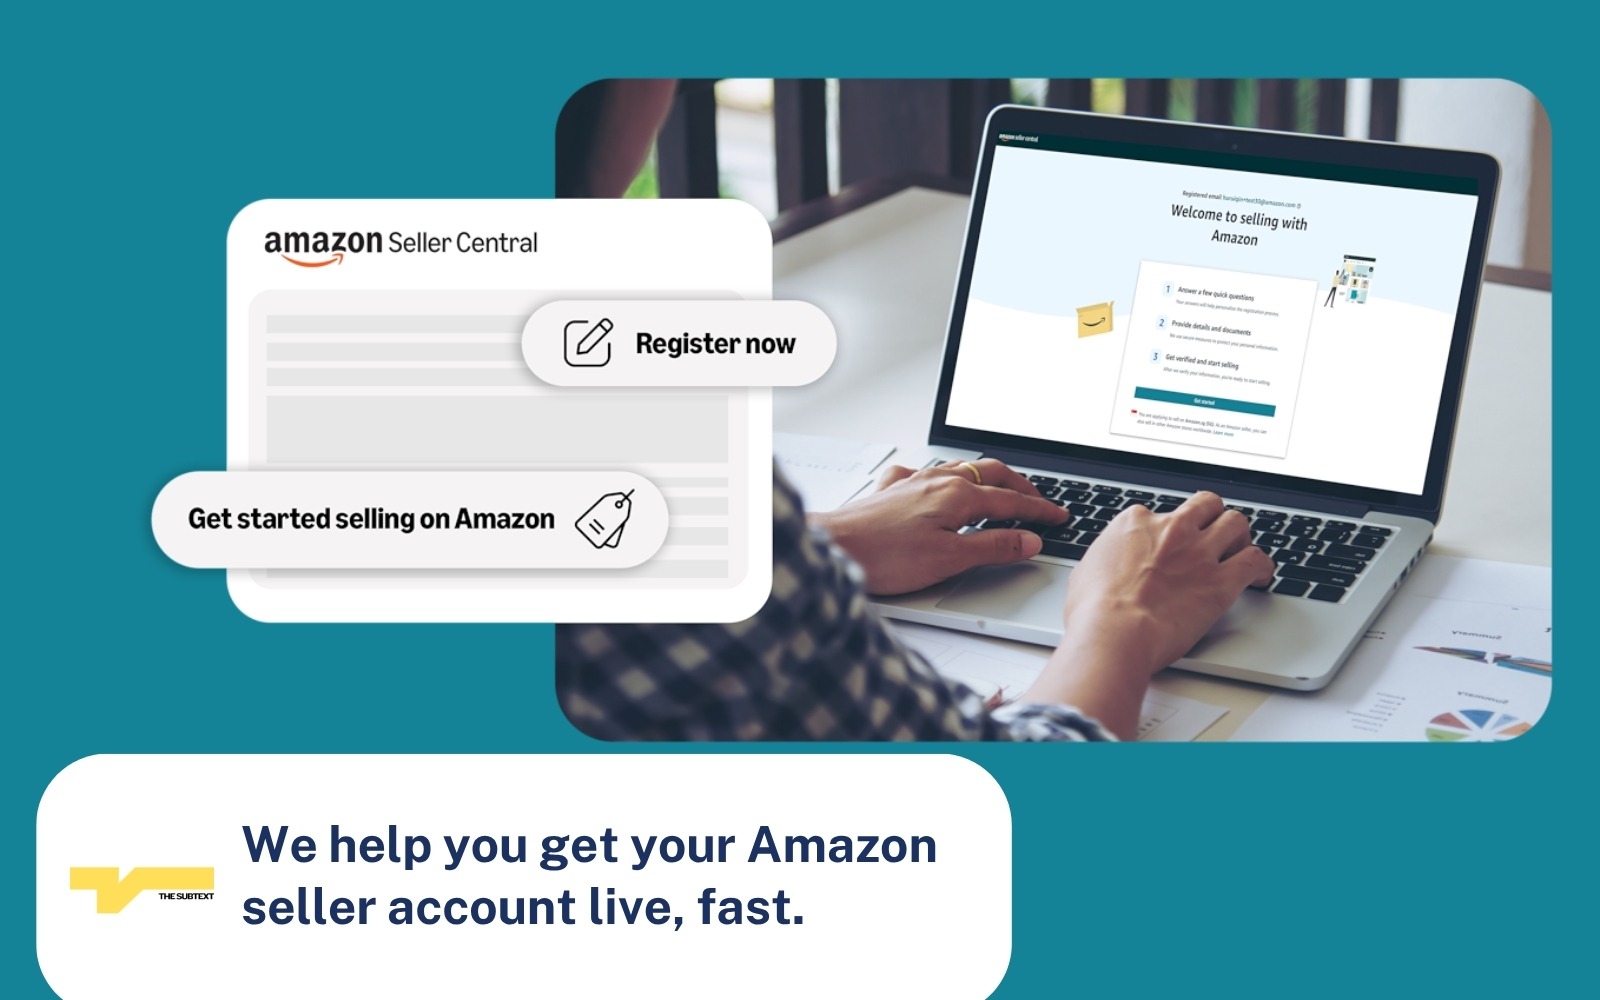
Amazon Seller Registration: We Get Your Account Live on Seller Central
You have your GSTIN, PAN, and bank account ready. You just need someone to get your Amazon seller account registered, verified, and listing-ready without dealing with document rejections and video KYC delays.
At The Subtext, we handle Amazon seller registration from start to finish. We review your documents for consistency, register your account on Seller Central, manage the verification process (including video KYC if Amazon triggers it), and set up your first product listings with titles, descriptions, images, and pricing built for Amazon search visibility.
What We Handle
- Document review and alignment (GSTIN, PAN, bank details, address proof must match exactly)
- Amazon Seller Central account registration and setup
- Selling plan selection (Individual vs Professional) based on your volume and goals
- Video KYC and document verification follow-up
- Store name setup and tax settings configuration
- First product listings with search-optimized titles, bullet points, descriptions, and images
- Shipping method selection (Easy Ship, FBA, or Self-Ship) and configuration
What You Need Before You Come to Us
- A registered business entity (sole proprietorship, LLP, or company)
- Active GSTIN linked to your PAN (Amazon requires GST for most categories)
- A current bank account in your business name
- Business address proof matching your GST certificate state
- At least one product ready to list (images, description, pricing)
If you still need entity registration or GST, work with a CA first. Our job starts once your paperwork is in order.
What Amazon Seller Registration Involves
Amazon seller registration is the process of creating a seller account on Amazon Seller Central (sellercentral.amazon.in), verifying your identity and business documents, and getting approval to list and sell products on Amazon India.
It sounds simple, and it can be, if your documents are aligned. The problem is that Amazon’s verification is one of the strictest among Indian marketplaces. Your legal entity name on your GST certificate, PAN card, bank account, and Seller Central application must match character for character. A difference as small as writing “Pvt Ltd” on one document and “Private Limited” on another can lead to a rejection.
Beyond document verification, Amazon may require a video KYC call where you show your original PAN, GST certificate, and address proof on camera. This step catches many sellers off guard, especially if they registered GST through an agent and do not have the original documents on hand.
Once approved, your account goes live and you can start listing products. But the listing step also matters. A poorly structured product listing with a weak title, missing keywords, and bad images means your product sits invisible in a catalogue of over 168 million products. We handle both registration and listing setup to make sure you start with visibility, not just an account.
Documents Required for Amazon Seller Registration
Here is exactly what Amazon asks for during the registration process. Having everything ready before you start saves you from mid-application delays.
Document | Details |
GSTIN | Must be active and linked to your PAN. One GSTIN per seller account. Pickup address must be in the GST-registered state. |
PAN Card | Individual PAN for sole proprietors. Business PAN for companies and LLPs. |
Bank Account | Current account preferred. Account holder name must match GST certificate exactly. |
Business Address Proof | Utility bill, rent agreement, or property tax receipt. Must be in the same state as GST registration. |
Mobile Number | For OTP verification and seller support communication. Should not be linked to an existing Amazon buyer account. |
Email Address | Dedicated email for Seller Central. Can use an existing Amazon account or create a new one. |
Product Identifier (UPC/EAN/ISBN) | Required for most categories. You can apply for a GTIN exemption for unbranded products. |
Brand Authorization (if applicable) | Needed if you are reselling a branded product. Not required if you own the brand. |
A common question: can you register on Amazon without GST? Only if you are selling exclusively GST-exempt products like books, unbranded food items, or certain handicrafts. For everything else, GST is mandatory. Amazon does not have an enrollment ID system like Meesho.
Documents Ready but Stuck on Registration?
Most registration delays come from mismatched details across documents. We review everything before submission, flag issues, and handle the entire Seller Central setup. No back and forth with Amazon support. Let’s talk.
Amazon Seller Registration Process: Step by Step
Here is how the registration process works on Amazon India, and where we come in at each step.
Step 1: Go to Seller Central and Create Your Account
Visit sellercentral.amazon.in and click “Start Selling.” You will need to enter your email address and set a password, or log in with an existing Amazon account. We recommend using a dedicated email for your seller account to keep business communications separate.
Step 2: Enter Your Business Information
Amazon asks for your business name, business type (sole proprietor, partnership, company), and registered address. These details must match your GST certificate. If they do not, your application gets flagged during verification and you lose days.
Step 3: Submit Your GST and PAN Details
Enter your GSTIN and PAN. Amazon cross-verifies these against government databases. Your GSTIN must be active (not cancelled or suspended) and linked to the PAN you provide. If you registered GST in multiple states, use the GSTIN for the state where your pickup address is located.
Step 4: Add Your Bank Account
Provide your bank account number and IFSC code. Amazon verifies the account holder name against your business name on GST. This is the single most common point of failure in the registration process. Even a minor spelling difference triggers a mismatch. We check this before submission.
Step 5: Set Your Pickup Address and Store Name
Your pickup address must be in the same state as your GST registration. Amazon will collect shipments from this address for Easy Ship orders. Your store name is visible to customers, so choose something that represents your brand. You can change it later through Seller Central, but it requires contacting support.
Step 6: Select Your Product Category
Some categories on Amazon are open (anyone can list), while others require approval. Categories like jewellery, grocery, and certain electronics need additional documentation or brand authorization. If your product falls in a restricted category, we handle the approval application as part of the setup.
Step 7: Complete Video KYC (If Required)
Amazon may trigger a video verification call where you need to show your original PAN card, GST certificate, and address proof on camera. This step is random but common for new sellers. We prepare you for this so it goes smoothly on the first attempt.
Step 8: Account Activation and First Listing
Once verification is complete, Amazon activates your account and you get full access to Seller Central. We then set up your first product listings with optimized titles, bullet points, descriptions, backend keywords, and images. Your products start appearing in Amazon search results.
Individual vs Professional Selling Plan
Amazon India offers two selling plans. Choosing the right one at registration matters because it affects your fees, tools, and growth options.
Individual Plan
Designed for sellers doing fewer than 40 orders per month. There is no monthly subscription fee, but Amazon charges a per-item fee on each sale. You get basic listing tools but no access to advertising (Sponsored Products), bulk listing, or advanced reports. This plan works if you are testing a product or selling in very low volumes.
Professional Plan
Designed for sellers planning to scale. There is no per-item fee, and you get full access to Amazon Advertising, bulk listing tools, A+ Content, Brand Registry eligibility, and detailed business reports. Most sellers we register start on Professional because the tools it unlocks are essential for visibility and growth.
You can switch between plans at any time after registration. But if you start on Individual and want to run ads, you will need to upgrade first, which means lost time during your launch window.
Our recommendation: unless you are genuinely testing a single product with no plans to scale, start with Professional. The cost is recovered with your first few sales through better visibility and advertising access.
Shipping and Fulfillment: FBA vs Easy Ship vs Self-Ship
During registration, Amazon asks you to choose a shipping method. This decision affects your delivery speed, customer trust, Prime eligibility, and operational workload.
Fulfilled by Amazon (FBA)
You send your inventory to Amazon’s warehouse. Amazon stores, packs, ships, and handles returns. Your products become eligible for Prime and get the “Fulfilled by Amazon” badge, which improves conversion rates. FBA works best for sellers with consistent inventory, products that sell at a steady pace, and items that are not oversized or extremely heavy. The tradeoff is storage fees and less control over your inventory.
Easy Ship
You store inventory at your own location. When an order comes in, Amazon’s delivery partner picks up the package from your address and delivers it to the customer. You handle packing, Amazon handles last-mile delivery. This is the most popular option for new sellers in India because it balances convenience with cost. Amazon recently reduced Easy Ship fees by over 20% for products under Rs 300, making it even more attractive for low-ticket items.
Self-Ship (Merchant Fulfilled)
You handle everything: storage, packing, shipping, and delivery. You use your own courier partners. This gives you the most control but also the most operational burden. Works for sellers who already have a logistics setup or sell in categories where Amazon’s shipping options are not practical (very large items, fragile goods, local-only products).
We help you choose the right fulfillment method during setup based on your product type, order volume, and operational capacity. For most new sellers starting with a small catalogue, Easy Ship is the practical starting point. FBA makes sense once your volume justifies the inventory commitment.
Amazon Seller Registration Fees and Selling Costs
Registration on Amazon is free. There is no signup fee. The costs come after you start selling, in the form of referral fees, shipping fees, and optional program charges.
Fee Structure Overview
Fee Type | Details |
Registration Fee | Rs 0 (free to register) |
Referral Fee | Varies by category (typically 5% to 25%). Zero referral fee on products priced under Rs 1,000 across 1,800+ categories as of March 2026. |
Closing Fee | Fixed per-item fee based on price slab and fulfillment method. Ranges from Rs 3 to Rs 75. |
Shipping Fee (Easy Ship) | Based on weight, dimensions, and delivery distance. Recently reduced by 20%+ for products under Rs 300. |
FBA Fee | Includes pick, pack, and shipping. Additional storage fee based on volume. Varies by product size and season. |
TCS (Tax Collected at Source) | 1% collected by Amazon on your sales and deposited with the government. Claimable as credit during GST filing. |
The March 2026 fee update expanded zero referral fees to over 12.5 crore products priced under Rs 1,000 across 1,800+ categories. This is a meaningful change for sellers in fashion, accessories, home, and other mid-price categories. Combined with reduced Easy Ship fees, the per-unit cost of selling on Amazon has dropped significantly for a majority of product types.
Use Amazon’s Revenue Calculator in Seller Central to model exact fees for your specific products before you start listing.
Want to Start Selling on Amazon Without the Setup Headache?
We register your account, configure your shipping, set your tax settings, and create your first listings. You focus on sourcing and inventory. Book a free consultation.
Common Mistakes During Amazon Seller Registration
These are the errors we see most often. Each one can delay your launch by days or weeks.
Name Mismatch Between GST and Bank Account
This is the number one cause of registration rejection. “Sharma Trading Co” on GST and “Sharma Trading Company” on your bank account will fail verification. The match must be exact. We cross-check every document before submission.
Using a Previously Linked Email or Phone
If your email or phone number is already associated with an Amazon buyer account, it can cause complications during seller registration. Use a fresh, dedicated email for your seller account. If you must use an existing Amazon login, understand that your buyer and seller accounts will be linked.
Wrong GST State for Pickup Address
Your pickup address must be in the same state as your GST registration. Amazon enforces this for tax compliance. If your warehouse is in a different state from your GST, you will need a separate GST registration for that state, or you will need to change your pickup address.
Not Preparing for Video KYC
Amazon’s video verification requires you to show original documents on camera. Sellers who got their GST through an agent and only have digital copies often fail this step. Have your original PAN, GST certificate, and address proof physically ready before starting registration.
Skipping Product Identifiers
Amazon requires a UPC, EAN, or ISBN for most product listings. Many first-time sellers do not know this until they try to create their first listing and get blocked. If you sell unbranded products, you can apply for a GTIN exemption, but this takes additional time. We handle the exemption application as part of our setup process.
Choosing the Wrong Category
Some categories require pre-approval (grocery, jewellery, health, automotive parts). Registering your account and then discovering your product category is gated wastes time. We check category eligibility during document review, before we start the registration.
What Happens After Your Amazon Account Is Live
Getting your seller account approved is step one. Here is what comes next.
Product Listing Setup
Each listing needs a title (with keywords), bullet points, a product description, backend search terms, images (at least 5 to 7 per product), and pricing. The quality of your listing directly affects where you appear in Amazon search results and how many buyers click through to purchase. We build every listing for discoverability, using keyword research specific to Amazon’s A9 search algorithm.
Brand Registry (Optional but Recommended)
If you have a registered trademark (or even a pending application), you can enroll in Amazon Brand Registry. This gives you access to A+ Content (enhanced product descriptions with images and comparison charts), Sponsored Brands ads, brand analytics, and protection against listing hijackers. We handle the Brand Registry application as part of our service if you have a trademark.
Advertising Setup
Amazon Sponsored Products is how most sellers get their first sales. It is a pay-per-click system where your products appear at the top of search results for keywords you bid on. We can set up your initial campaign structure as part of the launch, or you can manage this separately.
Account Health Monitoring
Amazon tracks your Order Defect Rate, Late Shipment Rate, and Cancellation Rate. If these metrics fall below Amazon’s thresholds, your account can get warnings or suspensions. From day one, your operations need to support timely dispatch and accurate listings.
Selling on Amazon Alone Limits Your Reach
Most serious sellers register across Amazon, Flipkart, Meesho, and quick commerce platforms together. It reduces platform risk and increases product visibility across different buying behaviors.
Our ecommerce registration service handles multi-platform onboarding end to end, so you do not repeat document submissions or deal with separate verification delays.
Selling FMCG or Food Products? Consider Quick Commerce.
If your product category includes packaged food, beverages, beauty, personal care, or household consumables, Amazon is only one channel. Quick commerce platforms like Zepto, Blinkit, Swiggy Instamart, and BigBasket are where impulse buying happens in urban India with 10-minute delivery windows.
We handle seller and vendor registration on all major quick commerce platforms with the same approach: document review, submission, verification, and product listing. The onboarding process for quick commerce is different from Amazon (stricter operational filters, barcode requirements, warehouse mapping), but we manage the platform-specific details.
How We Help With Amazon Seller Registration
At The Subtext, we handle the marketplace registration and listing side of selling on Amazon. Here is what our Amazon registration service includes.
Document Review
We check your GSTIN, PAN, bank account, and address proof for exact name and address alignment before anything is submitted to Amazon. If something is off, we tell you exactly what needs correcting. This pre-check eliminates the most common cause of registration delays.
Seller Central Account Setup
We register your account, select the right selling plan, configure tax settings, set up your pickup address, and choose your fulfillment method. Every setting is configured correctly the first time.
Verification Management
If Amazon triggers video KYC or requests additional documents, we walk you through the process and prepare you for what to expect. If a document gets rejected, we identify the issue and handle resubmission.
Product Listing and Launch
After your account is live, we create your first product listings. Each listing includes a keyword-optimized title, bullet points, product description, backend search terms, and image specifications. Your products are built to appear in buyer searches from day one.
Category Approval (If Needed)
If your product falls in a restricted category, we prepare and submit the approval application with the required documentation. We handle this as part of the registration process so there is no gap between your account going live and your products being listable.
Skip the Back and Forth. Go From Documents to Live Amazon Store in Days.
Book a call. We will review your documents, confirm your category eligibility, and give you a clear timeline for getting your Amazon seller account live.
Questions Sellers Ask Us About Amazon Registration
Q1: Is GST mandatory to sell on Amazon India?
Yes, for most product categories. Amazon requires an active GSTIN linked to your PAN. The only exceptions are GST-exempt categories like books and certain unbranded food items. If you do not have GST yet, get it sorted with a CA before contacting us for marketplace registration.
Q2: How long does Amazon seller registration take?
Once your documents are ready and aligned, account creation takes about 15 to 20 minutes. Verification can take 24 to 72 hours. Video KYC, if triggered, adds another day or two. Most sellers we register are fully live within 1 to 3 business days.
Q3: Is there a fee to register as a seller on Amazon?
Registration itself is free. Amazon charges referral fees, closing fees, and shipping fees once you start selling. As of March 2026, products priced under Rs 1,000 across 1,800+ categories have zero referral fees.
Q4: Can I use my existing Amazon account to sell?
Yes. You can use the same email and login you use as a buyer. Your buyer and seller accounts will be linked. If you prefer to keep them separate, register with a new email.
Q5: What if my Amazon seller registration gets rejected?
Almost always a document mismatch. We check name, address, and GSTIN consistency across all documents before submission. If a rejection still happens, we identify the exact issue and resubmit with corrections.
Q6: Do I need a trademark to sell on Amazon?
No. Trademark is optional for basic seller registration. However, you cannot access Amazon Brand Registry, A+ Content, or Sponsored Brands ads without at least a pending trademark application. We recommend applying for a trademark early if you are building your own brand.
Q7: Can I sell on Amazon and Flipkart at the same time?
Yes. Most sellers we work with register on multiple platforms simultaneously. We also handle Flipkart and Meesho seller registration. Just make sure your inventory management can support multi-channel fulfillment.
Q8: What do you handle after my Amazon account is live?
We set up your first product listings with optimized titles, descriptions, images, and pricing. We also handle category approvals and Brand Registry applications if applicable. Our goal is to get your products visible in Amazon search results from day one.
Q9: Do you also handle quick commerce registration?
Yes. For sellers with FMCG, food, beauty, or household products, we register accounts on Zepto, Blinkit, Swiggy Instamart, and BigBasket. Same process: document review, submission, verification, and product listing.